


 English
  Español
How to Fix a Leaky Kitchen Faucet: Step-by-Step Repair and Replacement Guide
Date:2026-09-15
Content
- 1 Common Causes of a Leaky Kitchen Faucet
- 2 Tools and Safety Checks Before You Start
- 3 How to Fix a Leaky Kitchen Faucet, Step by Step
- 4 When Should You Call a Professional or Replace the Faucet?
- 5 How to Choose a Replacement Kitchen Faucet That Won't Leak
- 6 Maintenance Tips to Prevent Future Kitchen Faucet Leaks
If water is dripping from your kitchen spout, pooling around the handle, or running down the supply lines under the sink, you do not need to replace the entire fixture right away. Knowing how to fix a leaky kitchen faucet starts with matching the symptom to the failed part, and most failures are caused by worn O-rings, washers, or a dirty cartridge. The quickest route to a dry sink is to shut off the water, open the faucet to relieve pressure, inspect the obvious seals, and replace the worn component. If your kitchen faucet is an instant electric kitchen faucet, add one more step: disconnect the power supply before any disassembly. Once the water is off and the unit is isolated, the repair process is manageable with basic tools. This guide explains every common leak point, including those found on electric water heating faucets, then gives clear repair instructions.
In summary, tighten the loosened fittings first. If the drip continues, replace the rubber seals or the cartridge. A leak that comes from a crack in the body, a corroded valve seat, or an unavailable replacement part is the point at which replacement becomes smarter than another repair. The rest of this article gives the full workflow, the tools needed, and the maintenance habits that keep a repaired faucet dry for years.
Key takeaway: Most leaky kitchen faucets can be fixed in under an hour by replacing a worn seal, O-ring, or cartridge after you identify the exact leak location.
Common Causes of a Leaky Kitchen Faucet
Kitchen faucets leak for a limited number of reasons, and recognizing the symptom helps you reach the right repair step faster. A drip from the spout usually points to a worn O-ring or a failed cartridge. A leak around the base or handle typically comes from a loose packing nut or a broken seal. A leak underneath the sink is often a supply connection problem rather than a faucet failure. In instant electric kitchen faucets, the water path includes a heating chamber, so leaks can also develop at the inlet and outlet fittings. The chart below shows the approximate distribution of common leak locations, based on service records and repair guides.
| Leak location | Approximate share | Visual distribution |
|---|---|---|
| Spout or aerator drip | 38% | 38% |
| Handle or base area leak | 27% | 27% |
| Supply line or connection leak | 21% | 21% |
| Sprayer or pull-out hose leak | 9% | 9% |
| Instant electric heating chamber or fittings | 5% | 5% |
Two conclusions stand out from this distribution. First, most leaks are in the outlet and sealing areas, not in the faucet body. Second, a significant share of leaks involves the handle and base, which means that rubber parts lose their elasticity after years of hot-and-cold cycling. The chart also shows that supply-line leaks, though less frequent, are easier to miss because the water may travel along the pipe and pool in the cabinet. In an instant electric faucet, the low share of heating-chamber leaks reflects the fact that sealed tankless heaters rarely fail internally; when they do leak, the usual cause is a loose fitting or scale buildup at the inlet. These numbers explain why most repair guides start with the simplest parts: aerators, washers, O-rings, and cartridges. You do not need to replace the entire faucet for a standard drip. You also do not need to cut into the plumbing if the leak is above the shut-off valve. Finally, the chart reminds us to check the sprayer hose and the needle-valve connections, especially in pull-out faucets. If your kitchen faucet is an electric model, add heating-module fittings to the checklist. This routine diagnostic flow is the fastest route from a visible leak to a confirmed fix.
To make the diagnosis even clearer, the table below lists the most common leak types, the likely failure point, and the difficulty of a typical repair.
| Leak location | Likely cause | Repair difficulty |
|---|---|---|
| Spout drip when faucet is off | Worn O-ring or failed cartridge | Easy |
| Water around the base | Loose packing nut or mounting nut | Easy |
| Water around the handle | Damaged cartridge seal | Moderate |
| Water under the sink | Loose supply connection or worn washer | Easy |
| Instant electric faucet body leak | Fitting seal or scale buildup | Advanced |
Key takeaway: The leak location tells you which seal to replace, and the majority of repairs are straightforward if you do not ignore the early drip.
Tools and Safety Checks Before You Start
Assemble these tools before opening the faucet, because a partly disassembled faucet with a missing wrench is a common cause of rushed mistakes.
- Adjustable wrench and basin wrench
- Flat-head and Phillips screwdrivers
- Hex or Allen key set
- Needle-nose pliers
- Replacement O-rings, washers, and a new cartridge compatible with your faucet
- Plumber's tape and silicone faucet grease
- Bucket, towels, flashlight
Safety begins under the sink. Close the hot and cold shut-off valves, then open the faucet handle to release residual pressure and drain the remaining water. Place a bucket under the supply lines when you disconnect anything. For a conventional kitchen faucet, that is usually enough. For an instant electric kitchen faucet or any electric water heating faucet, unplug the unit from the outlet and turn off the dedicated circuit breaker before touching the metal body. Water and electricity do not mix, and the heating element can remain live for a short time after unplugging.
Once the water supply is off, confirm that the handle is fully open and no drips appear after a few minutes. If you still see water under the sink, the problem may be in the shut-off valve itself or in the wall supply pipe. In that case, tighten the valve or call a plumber before opening the faucet. When the system is empty, move on to the repair steps that match your leak location.
Key takeaway: Always shut off both water and electricity before working on an instant electric faucet, and never force a stuck nut because the underlying seal is often the real issue.
How to Fix a Leaky Kitchen Faucet, Step by Step
This sequence assumes the water supply is off and the faucet is at atmospheric pressure. Work slowly and take photos before removing parts when possible. A kitchen faucet seals water around a moving stem or ceramic disc. If the rubber O-ring or cartridge seal is worn, water leaks around it. The following steps give a proven workflow for the most common repair categories.
Fix a Dripping Spout or a Worn O-Ring
If the drip comes from the spout when the handle is closed, the seal between the valve stem and the spout has usually failed. On a two-handle faucet, remove the handle screw, pull off the handle, and unscrew the bonnet with an adjustable wrench. Lift out the valve stem and inspect the O-ring on the stem. If the rubber is flattened, cracked, or brittle, replace it with an identical size and lubricate it with silicone grease before reinserting. On a single-handle faucet, a constant spout drip is more likely the cartridge. Remove the handle, the decorative cap, and the retaining clip or nut, then pull the cartridge upward. Take the old cartridge to a hardware store to match the shape, ports, and stem diameter.
- Close both shut-off valves under the sink and open the handle to release pressure.
- Lay a towel in the basin and close the drain to catch small screws and clips.
- Remove the handle screw or hidden set screw, then lift the handle off the splined stem.
- Unscrew the bonnet or unclip the retainer and pull the old cartridge upward.
- Compare the old cartridge with the replacement, including the shape of the stem and the number of water ports.
- Install the new cartridge, align the anti-rotation tabs, refit the retainer, and reassemble the handle.
- Turn the water back on slowly and check for drips before reinstalling the decorative cap or handle button.
Repair a Leak Around the Base or Handle
A leak that appears at the base of the spout or around the handle while the water is running usually means the packing nut or the cartridge seal is not seating properly. First, tighten the packing nut clockwise by an eighth of a turn. Over-tightening a brass nut can crack the valve body. If tightening does not stop the leak, remove the nut and add a layer of plumber's tape on the threads, then reinstall. For a ball-type or cartridge faucet, water around the handle after a cartridge replacement often indicates the anti-rotation tabs did not align with the slots. Pull the handle off and re-seat the cartridge so that the tabs fit before you tighten the retainer.
Tighten a Loose Spout or Mounting Nut
A loose kitchen spout can cause a slow leak underneath the flange. Use a basin wrench to reach the mounting nuts under the sink. Tighten them evenly in a crisscross pattern; if the nuts are corroded, spray a small amount of penetrating oil and wait a few minutes. After tightening, wipe the area dry and run water through both hot and cold positions to confirm that the leak has stopped.
Fix a Leak Under the Sink
Leaks below the sink are often at the supply tubes where they connect to the tailpieces. Tighten the compression nuts with a j-plier or adjustable wrench, but avoid cranking them extremely tight because the rubber washer inside can deform. If water seeps from the braided hose itself, replace the hose. If the leak comes from the sprayer saddle tee or the hot water inlet of a dishwasher, check the small O-rings inside these connection points and replace them. For an under-sink leak that looks like the faucet body, unscrew the sidesprayer valve and inspect its seat before assuming the faucet is cracked.
Fix a Leaking Sprayer or Pull-Out Hose
When the sprayer drips from the head, unscrew the spray head and clean any sediment from the rubber nozzle. Some spray heads contain a small check valve with an O-ring; replace it if the leak persists. For a pull-out kitchen faucet, a loose hose connection at the faucet outlet can create a hidden leak inside the cabinet. Remove the hose fitting and wrap the threads with plumber's tape, then retighten. Also check the weight and the spring guide because a kinked hose can push water back through the outlet.
Special Considerations for Instant Electric Kitchen Faucets
An instant electric kitchen faucet contains a flow chamber, a heating module, and temperature sensors, so the same repair logic applies but with more precautions. Leaks usually appear at the inlet and outlet fittings, the drain valve, or the connection between the faucet head and the body. Tighten the fittings, replace any rubber gasket, and clean the inlet mesh filter if scale has reduced flow and pressure. Do not open the sealed heating chamber unless you are a qualified technician, because the pressure and electrical components inside need factory validation. If the body is leaking from a hairline crack or the heating module shows signs of corrosion, the safe choice is replacement rather than repair. Many factories, including our own, build these units with replaceable inlet screens and service-friendly O-rings, but the internal heating core is intended to remain sealed for the life of the product.
For a complete look at the typical structure and features of these water heaters, browse our instant electric water heating faucet collection.
Key takeaway: Work from the outside in: tighten fittings first, replace visible seals second, and only open the electric heating module when a qualified service technician is available.
When Should You Call a Professional or Replace the Faucet?
Not every leak is a do-it-yourself repair. If the faucet body is cracked, the valve seat is eroded, or the cartridge design is no longer manufactured, repeated repairs will waste time and money. A professional is also the right call when the visible parts are fine but water continues to pool underneath the sink, because that kind of leak may come from behind the wall or inside the shut-off valve. For an instant electric kitchen faucet, any leak that occurs near the heating module while the unit is powered should be treated as a safety issue; unplug it and contact the manufacturer or a licensed electrician before further use.
If the faucet is made of low-grade alloy and shows white corrosion spots, or if the plated finish is flaking, the structural integrity will continue to weaken. Replacing the faucet with a new unit is usually cheaper than paying for repeated visits. The table below compares the repair-versus-replace decision based on the most common factors.
| Factor | Repair | Replace |
|---|---|---|
| Cost of parts and labor | Low for O-ring or cartridge | Higher but includes a new warranty |
| Age of the faucet | Better if under five years | Better if over ten years |
| Corrosion or scale | Only if localized to the seal | Better if body or valve seat is worn |
| Availability of replacement cartridge | Repair if the exact model is available | Replace if the cartridge is discontinued |
| Electric faucet with internal leak | Only through qualified service | Usually safer to replace |
When replacement becomes the better option, consider a faucet that eliminates common leak causes. A ceramic disc cartridge resists corrosion and outlasts rubber washers; stainless steel construction handles repeated thermal cycling; and a reputable manufacturer will supply clear maintenance instructions. For a kitchen that needs instant hot water, the replacement can be an electric water heating faucet rather than a traditional cold-water fixture.
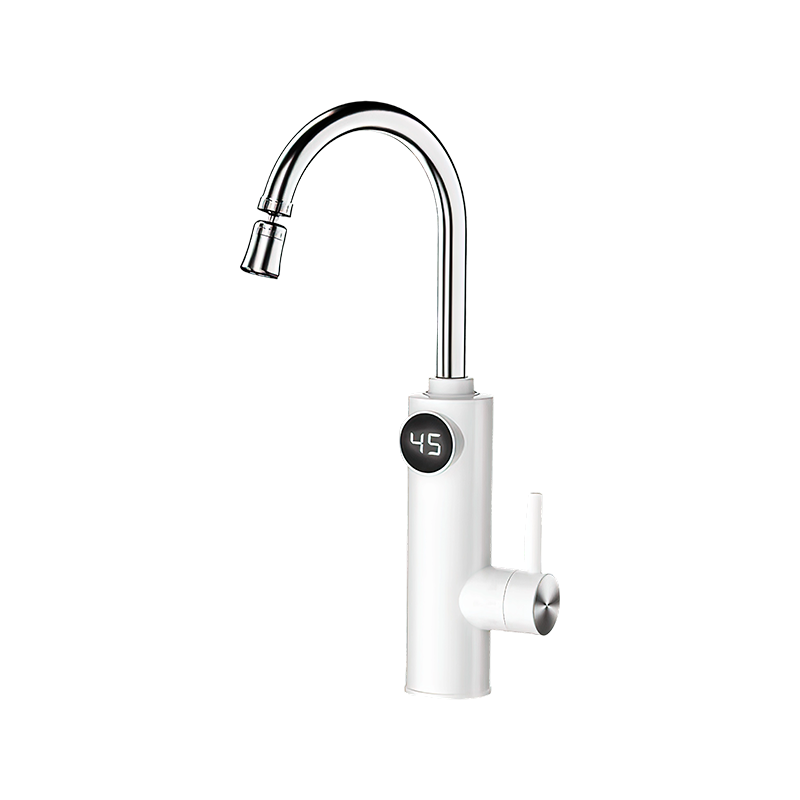
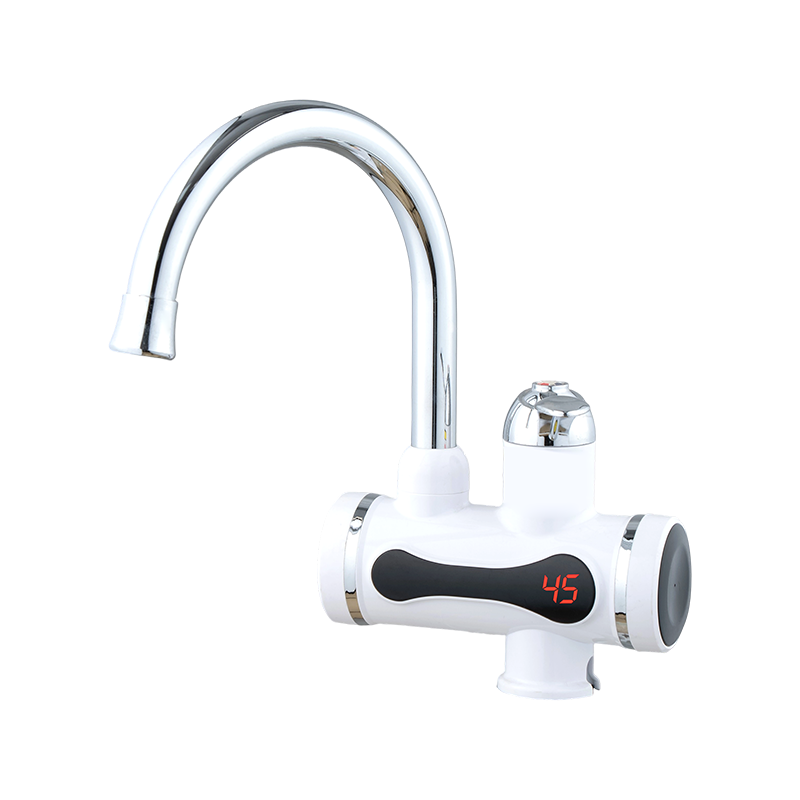 DRL-01AX-34 3400W Instant Electric Kitchen Faucet with Temperature DisplayThis ABS electric kitchen faucet delivers instant hot water via a 3400W heating element and features a digital temperature display. Its cold-hot mixing system helps stabilize output during pressure changes, making it a practical replacement for a leaky faucet.View Product →
The card above points to a 3400W instant electric kitchen faucet with cold and hot mixing capability, which is one practical way to replace an aging leaky faucet while gaining an on-demand hot water supply. Before ordering, check the inlet thread size, the available power supply, and the sink depth to ensure the unit fits your countertop.
Key takeaway: Replace the faucet when the body, seat, or cartridge is physically damaged; if the old faucet only has a worn seal, a small repair is almost always the better value.
How to Choose a Replacement Kitchen Faucet That Won't Leak
Before you buy a new kitchen faucet, map out the parameters that affect leak resistance: body material, cartridge type, spout height, installation method, and whether you want to add instant heating. A faucet for a large household with heavy use should have a solid metal body or a high-grade ABS composite with reinforced thread fittings. A kitchen with hard water needs an easy-to-clean strainer and a cartridge that can tolerate scale.
There are three common choices when your current faucet is beyond repair. The first is a standard mechanical kitchen faucet with a ceramic cartridge. The second is an instant electric kitchen faucet that heats water as it passes through. The third is a quick-free installation electric faucet designed for homes that do not want to modify existing countertop plumbing. The table below compares the two electric options because they are increasingly popular replacements for leaky kitchen fixtures.
| Factor | ABS instant electric kitchen faucet | Stainless steel instant electric kitchen faucet |
|---|---|---|
| Body strength | Lightweight, impact-resistant, lower cost | Stronger, more rigid, corrosion-resistant finish |
| Weight on sink deck | Low | Medium to high |
| Thermal stability | Suitable for 3000-3400W heating | Suitable for high power with stable temperature |
| Maintenance | Easy to wipe, keep seals dry | More resistant to scratches and chemical deposits |
| Best application | Budget-conscious kitchens, rental use | Busy kitchens, higher water usage, long-term installations |
When you compare models, pay attention to the cartridge and the control mechanism. A ceramic disc cartridge is the least likely to drip after years of use. A faucet with a metal lever instead of a plastic knob will also feel more durable. For instant electric faucets, verify the power rating, the IPX4 water resistance, the leakage protection, the temperature display, and whether the heater has a flow switch that prevents dry heating. These features directly affect safety and leak frequency.
If a stainless steel body with temperature adjustment fits your needs, the following product card represents the type of unit we recommend as a durable replacement.
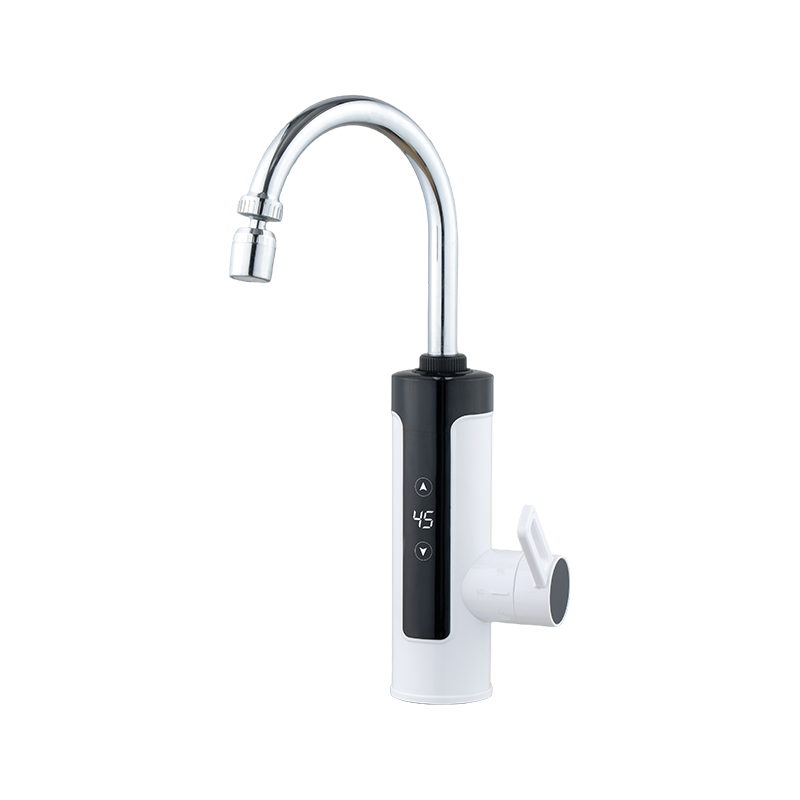
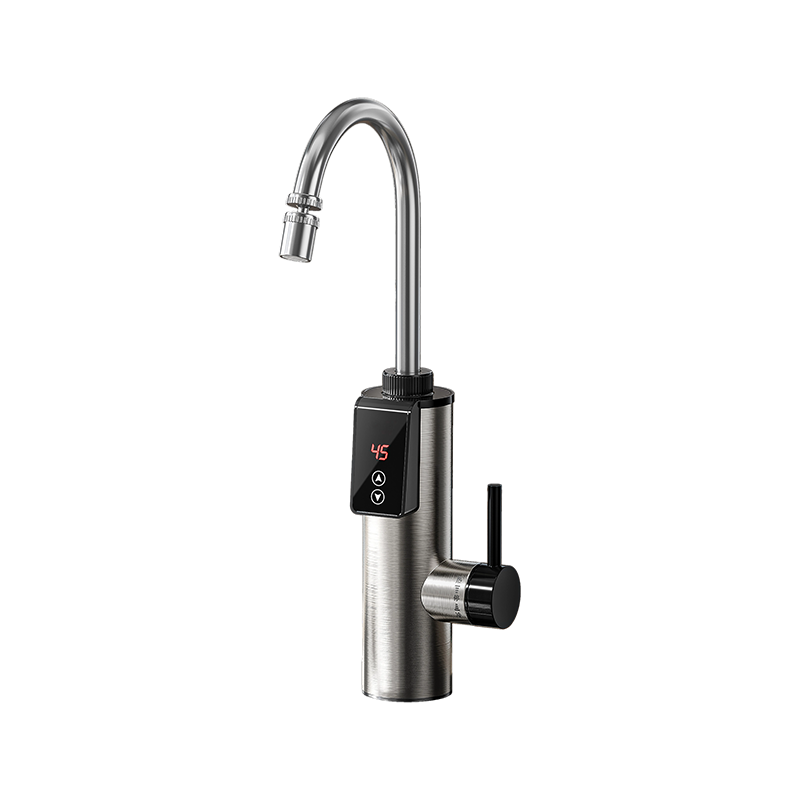 BS-09-34 Stainless Steel Adjustable Instant Hot Water Faucet with ThermostatBuilt with stainless steel for corrosion resistance, this 3400W faucet uses frequency-conversion constant temperature control to maintain steady water temperature. Its one-button start and overheat protection suit durable kitchen use, aligning with the leak-prevention design discussed above.View Product →
This stainless steel constant-temperature model is designed around the same service concepts that reduce leaks: smooth flow path, fewer joints, a replaceable inlet filter, and a temperature sensor that shuts off heating if the flow is interrupted. Whatever you buy, keep the instruction sheet and record the model number for future cartridge and O-ring replacements.
Key takeaway: Choose a replacement faucet with a ceramic cartridge, corrosion-resistant body, and a straightforward seal layout; these three features have the strongest influence on long-term leak prevention.
Maintenance Tips to Prevent Future Kitchen Faucet Leaks
Most leaks start because rubber seals are neglected until they fail. A simple monthly routine can extend the life of a faucet cartridge and keep the faucet body free of scale.
- Clean the aerator every one to three months, especially if you notice an uneven spray or a sudden pressure drop.
- Move the handle gently and avoid hanging heavy items on the spout, because excess force breaks the stem seal.
- Wipe the base and handle dry after use so water does not sit on the plating or finish.
- Check under the sink for dampness at least once a month, including the supply tubes and the sprayer line.
- If your water is hard, install a basic filter or scale reducer at the inlet. Scale is one of the main causes of drips in instant electric faucets.
- For electric water heating faucets, follow the manufacturer's descaling schedule. In most models, unscrewing the inlet screen and rinsing it is enough.
- Replace a dripping cartridge quickly instead of waiting until the seat is worn.
It is also wise to keep spare O-rings and a universal cartridge in the utility drawer. When a drip appears on a weekend, the spare part allows you to fix it immediately before the water causes damage. If the faucet is still under warranty, do not disassemble the heating core; contact the supplier first.
Key takeaway: Monthly aerator cleaning, gentle handle use, and periodic under-sink inspection are low-effort habits that prevent most future faucet leaks.
A successful kitchen faucet repair never requires a full replacement when the leak comes from a worn seal, a loose connection, or a misaligned cartridge. The method is repeatable: isolate water and power, inspect the point where water escapes, replace the damaged rubber or ceramic component, and test through both hot and cold positions. For a faucet that is beyond repair, choose a new model with a ceramic cartridge, corrosion-resistant body, and simple maintenance access. If you need bulk quantities or custom requirements, an experienced manufacturer and supplier can provide OEM or ODM service, so the replacement faucets meet your quality and safety standards. Contact our sales team for sourcing support, technical documentation, and wholesale pricing.
We hope this guide helped you understand how to fix a leaky kitchen faucet, and which situations call for a new faucet instead. A dry sink is not a matter of luck; it comes from choosing the right parts, installing them carefully, and checking the faucet again after a month of normal use.
Key takeaway: Repair what is worn, replace what is damaged, and choose quality components if you upgrade; this is the complete formula for a permanently leak-free kitchen faucet.



NINGBO MAITENG ELECTRIC APPLIANCE CO., LTD. integrates production and sales. The company adopts a dual model of self-management and distribution sales.
- CONTACT INFO
-
NO.8 Yaobei Avenue,Simen Town, Yuyao City, Ningbo City, Zhejiang, China
-
 +86-159 5821 2132
-
 +86-574-62178444
-
 +86-159 5821 2132
-
 [email protected]
[email protected]
-
- SCAN IT
-
Mobile terminal

