


 English
  Español
Faucet Leaking From the Base: Causes, Fixes, and Comprehensive Prevention Tips
Date:2026-09-16
Content
- 1 Why Is My Faucet Leaking From the Base?
- 2 How to Diagnose a Faucet Leaking From the Base
- 3 How to Fix a Faucet Leaking From the Base: Step-by-Step Repair
- 4 Conventional Faucets vs. Instant Electric Water Heating Faucets
- 5 How to Prevent Faucet Leaks in the Future
- 6 Choosing a Leak-Resistant Faucet: What to Look For
- 7 Frequently Asked Questions About Faucet Base Leaks
You notice a small puddle forming around the base of your kitchen faucet. The drip is slow, but over a day it can stain the countertop, loosen the sealant, and even work its way into the cabinet below. A faucet leaking from the base is one of the most common household plumbing complaints, and in the majority of cases the cause is a worn O-ring, a loose packing nut, or a failed seal assembly that can be corrected in under an hour with basic tools. In some situations, however, the leak signals a deeper issue with the faucet body itself, and replacement becomes the more cost-effective route.
Before you replace anything, it helps to understand what actually sits at the base of a faucet and why water is able to escape. This guide walks you through the typical failure points, gives you a practical diagnosis procedure, and shows you when a repair is enough and when a new faucet—rather than another tube of silicone—is the smarter move. We also compare conventional mechanical faucets with instant electric water heating faucets, because the two designs have very different leak profiles and maintenance needs. Whether you are a homeowner facing a second dripping faucet or a wholesale buyer comparing faucet suppliers, the information here is meant to give you a clear decision path.
The term “base of the faucet” usually refers to the area where the spout meets the deck plate or where the faucet body is mounted into the sink or countertop. Water can appear at this junction for several reasons, and the look of the leak often reveals the source. A steady drip at the base while the faucet is off usually points to a failed cartridge that is letting water push past the seals. A leak only while the water is running often comes from the spout O-rings or a loose connection between the spout and the body. Understanding this distinction is the first step. Later in this article, we will look at the design of instant electric water heating faucets, which eliminate many of the traditional failure points by integrating the heating chamber directly into the faucet body.
Why Is My Faucet Leaking From the Base?
A base leak is rarely caused by a single catastrophic failure. In most cases, it develops gradually as sealing parts wear out or loosen. The causes can be grouped into four main types: worn elastomer parts, loose mechanical connections, mineral and debris buildup, and installation or pressure issues. Let us break down each one and give you an idea of how often it appears in real repairs.
- Worn O-rings and gaskets – The flexible rings that seal the spout to the faucet body. They harden, crack, and deform over time, especially in hot water use.
- Loose or failed packing nut – This nut holds the spout base together; thermal cycling and frequent swiveling can loosen it by a fraction of a turn, enough to create seepage.
- Sediment and limescale deposits – In hard-water areas, calcium and magnesium build up on valve seats and on the sealing surfaces, lifting seals and creating channels where water can escape.
- Deteriorated plumber’s putty or silicone – Some base leaks occur not inside the faucet but between the faucet’s deck plate and the sink surface. Cracks in this putty allow water to creep under the base.
- High water pressure – Pressures above 80 psi push against the seals and can cause slow weeping even on new faucets.
- Improper installation – Crooked mounting, over-tightened fittings, missing washers, or inadequate flux removal can all create leaks that appear at the base.
To give you a quick visual reference, we have ranked the common causes by how frequently they show up in residential service calls and online repair logs. The percentages below are estimates based on aggregated repair discussions and manufacturer service documentation, not a scientific survey. They are useful for prioritising your own troubleshooting, because they tell you what to check first. The list is organised from most common to least common. Use it as a decision guide before you start ordering parts.
Worn O-ring / gasket
45%
Loose/failed packing nut
20%
Sediment / limescale
15%
Installation error
10%
High water pressure
6%
Corrosion / other
4%
Worn O-rings lead the list because they are the only moving seal in a conventional faucet that is exposed to repeated compression and shear. Every time you swing the spout or move the handle, the O-ring flexes and rubs against a metallic or plastic counterface. Hot water speeds up the process by softening the rubber compound and accelerating oxidation. The result is a flattened, brittle ring that no longer occupies the full depth of its groove. Water finds the path of least resistance along this flattened seam and emerges around the base. Loose packing nuts are the second most common issue; these fasteners are easily retightened with a spanner, but many owners never think to check them because the drip appears to come from deeper inside the faucet. Limescale becomes a factor after two or three years of hard-water operation, and it affects both the cartridge and the spout seal. Fine carbonate particles act like a grinding paste between the moving parts, scoring the stainless steel or brass surface. Once a score line forms, the seal cannot fully close, and the leak persists even after new parts are installed unless the scoring is polished. Installation errors are more frequent in the first few months after a sink or faucet is fitted; they include cross-threaded unions, missing deck washers, and solder flux left inside the body. High water pressure is a pressure-appliance issue: many modern faucets have pressure-compensating cartridges, but these can also fail if the supply pressure exceeds the rating by a wide margin. Corrosion is more common in coastal or industrial areas where salt and airborne chemicals attack the chrome plating. It tends to start as pin-size rust spots and gradually opens up actual holes in the body. The overall picture is reassuring: around 80 percent of base leaks involve parts that cost less than $10 and take less than 30 minutes to replace. Only a small fraction require body replacement.
| Common Cause | Typical Symptom | Repair Difficulty | Frequency |
|---|---|---|---|
| Worn O-ring | Drip while faucet is running, around spout base | Easy | Very common |
| Loose packing nut | Continuous weep, worsens when spout is rotated | Easy | Common |
| Limescale buildup | Spray / drip on hot water side, uneven stream | Moderate | Common in hard water areas |
| Failed cartridge | Steady drip when faucet is off | Moderate | Common |
| Putty / silicone crack | Leak appears at deck plate edge, not at swivel | Easy | Occasional |
| High pressure | Pulsing drip, noise in pipes | Requires pressure regulator | Occasional |
Key takeaway: Most faucet base leaks are caused by a small set of replaceable parts. Check the O-ring, packing nut, and seal first—not the whole faucet.
How to Diagnose a Faucet Leaking From the Base
Diagnosing a faucet leaking from the base begins with a simple observation. Wait until the visible water is wiped away and the surrounding area is completely dry. Then watch the faucet through several cycles: while it is off, while cold water is running, and while hot water is running. The timing and position of the first droplet give you the strongest clue about which seal is responsible. A leak that appears only during hot water use often points to a hot-side cartridge or a limescale problem in the hot water chamber, while a drip that continues after shutoff usually indicates a damaged cartridge seat.
Follow These Six Diagnostic Steps
- Wipe the entire faucet and counter dry, then wait 10 minutes and note exactly where the first drop forms.
- Turn on the hot and cold supply lines separately to see which side contributes to the leak.
- Move the spout from side to side and watch whether the drip changes in flow rate or position.
- Check the handle area. A leak that starts at the handle can run down the outer surface and pool at the base, mimicking a base leak.
- Use a flashlight to inspect underneath the sink. If moisture is present under the deck, the problem may be in the supply lines or P-trap, not the faucet.
- Remove the decorative base cap, if accessible, and inspect the packing nut and mounting ring for visible corrosion or water trails.
The table below helps you match what you see to the most likely cause. The signs are not definitive by themselves, but they are a reliable starting point when combined with the age of your faucet and the local water quality.
| Observation | Likely Cause |
|---|---|
| Leak appears only when water is turned on | Spout O-rings or loose spout retaining nut |
| Leak continues after faucet is off | Failed cartridge or damaged valve seat |
| Dark green corrosion on brass or chrome parts | Long-term water penetration; oxide formation |
| Drip becomes faster when spout is rotated | Worn swivel O-ring or debris inside the swivel joint |
| Water on top of deck, but dry under the sink | Damaged plumber’s putty or silicone deck seal |
| Water collects only under the sink | Supply hose, P-trap, or shutoff valve leak, not a faucet seal |
Common Diagnostic Traps
Many homeowners misdiagnose a handle leak as a base leak. If the water drips down from the handle stem and travels along the outside of the spout, it will appear at the base even though the original source is the handle cartridge or the O-ring around the handle stem. Similarly, a newly installed faucet may leak because the supply ends were cross-threaded during mounting; this is not a fault of the faucet body. A third trap is assuming that an old faucet always needs replacement. In most older faucets with a standard deck-mounted design, the replacement parts are widely available and the repair takes far less time than a full swap.
Key takeaway: Diagnose before you disassemble. Watching when the drip appears—off, cold, hot, or while swiveling—will separate a simple O-ring issue from a deeper cartridge problem.
How to Fix a Faucet Leaking From the Base: Step-by-Step Repair
Once you have a confident diagnosis, the repair is straightforward. For the first attempt, you will need a small set of tools and a replacement seal kit. Most kits include a range of O-rings and gaskets, and buying one is cheaper than paying for a single visit from a plumber. The steps below assume a standard two-handle or single-handle kitchen faucet with a removable spout, which covers the majority of residential models.
What You Need
- Adjustable wrench or basin wrench
- Flathead and Phillips screwdrivers
- Replacement O-ring kit / faucet seal kit
- PTFE plumber’s tape
- Silicone faucet grease
- Lint-free towels or rags
Step 1: Shut Off the Water Supply
Look under the sink and close both shutoff valves. If your setup lacks shutoff valves, close the main water supply valve for the house. Open the faucet briefly to drain remaining water from the line and release pressure. This makes the disassembly cleaner and prevents surprise spray when you loosen a fitting.
Step 2: Remove the Handle and Spout Cap
Most faucets have a small set screw hidden behind a decorative cap on the handle or at the base of the spout. Pry off the cap, remove the screw, and lift the handle away. If the spout is a swivel type, grasp the spout firmly and pull upward after removing any retaining clip described in the manual. Older models may have a threaded collar that you unscrew counterclockwise.
Step 3: Inspect the Sealing Area
With the spout removed, you will see the O-ring groove, the packing nut, and the top of the cartridge or valve seat. Wipe away old grease, mineral scale, and any degraded rubber fragments. Use an old toothbrush or a soft brass brush to clean the grooves. Look for scoring on the metal surfaces; light roughness can be polished with fine sandpaper, but deep grooves mean the faucet body has given up its ability to seal.
Step 4: Replace the O-Ring and Gasket
Match the old O-ring to a new one from the kit—do not rely on visual similarity alone. Lubricate the new O-ring with silicone faucet grease to help it slide into the groove and hold its shape during installation. Place the O-ring squarely in the groove; a twisted ring will create a new leak path. If your faucet uses a flat gasket between the spout base and the body, replace it at the same time, even if it looks intact. Flat gaskets lose their compression set over time and may fail a few weeks after the O-ring is renewed.
Step 5: Reassemble and Test
Reinstall the spout, handle, and decorative cap. Open the hot and cold shutoff valves slowly and let the faucet run for a minute. Keep a towel wrapped around the base during the first test to catch any trace of water. Turn the faucet off, wipe the base dry, then wait ten minutes and inspect with a flashlight. If the seepage is gone, the repair is finished. If it still drips, repeat the disassembly and verify that the cartridge or valve seat is free of debris and corrosion.
| Condition Found | Best Action |
|---|---|
| Worn O-ring only | Repair with new O-ring |
| Loose packing nut, parts otherwise healthy | Tighten nut and re-test |
| Scored valve seat without visible cracks | Try seat polishing and new cartridge |
| Crack in the body or deep corrosion pits | Replace the faucet |
| Second major leak in the same year | Replace the faucet |
| Mineral scale fills the entire mixing chamber | Clean thoroughly and replace all seals |
Key takeaway: A base leak can often be stopped by replacing the O-ring and gasket. Stop the repair and plan a replacement when you find body cracks, deep corrosion, or repeated seal failures.
Conventional Faucets vs. Instant Electric Water Heating Faucets
Many homeowners do not realise how different an instant electric water heating faucet is from a conventional mechanical faucet. A standard kitchen faucet relies on a valve cartridge and rubber seals to mix hot and cold water that come from external supply lines. An instant electric faucet integrates a heating chamber directly into its body; it takes incoming cold water, passes it over a heating element, and delivers hot water almost instantly. This difference has a direct effect on how and where leaks develop. Because the heating chamber occupies the space that would otherwise hold a metal mixing body, the sealing logic is different: there is no separate hot water supply line under the sink, which means one fewer connection point to fail.
| Characteristic | Conventional Faucet | Instant Electric Faucet |
|---|---|---|
| Hot water source | External hot water pipe | Built-in heating chamber |
| Main sealing zones | Cartridge, spout O-ring, deck plate | Chamber end cap, inlet union |
| Typical leak locations | Base, spout, handle stem | Inlet connection, chamber seal |
| Dependency on water heater | Needs external tank or boiler | None – full instant supply |
| Maintenance focus | Rubber parts, cartridge wear | Descaling, end-cap seal, electric safety |
| Risk of under-sink leaks | Higher with more connections | Lower due to fewer lines |
The biggest advantage of the instant electric design from a leak perspective is the elimination of the hot water supply line under the sink. A traditional faucet leaking from the base may be receiving hot water from a corroded under-sink pipe; in an instant electric unit, there is only a cold water inlet and an electrical feed. Fewer plumbing connections naturally means fewer places for water to escape. That is not to say an instant electric faucet cannot leak. The heating chamber end cap and the inlet union are the two most likely points, and they are protected by O-rings and thread sealant. Better models use stainless steel chambers with machined sealing faces and thermal cut-off protection, so even if the O-ring begins to fail, the leak is more noticeable and easier to trace. If you are weighing a repair budget or planning to retire an old leaking faucet, considering an instant electric model can also reduce your hot water energy costs, because there is no standing water kept warm in a storage tank. Unlike conventional faucets, instant electric water heating faucets have no external hot-water hose and therefore fewer chances of under-sink leaks. The technology is not new. A well-maintained instant unit can last 6 to 10 years. If you would like to understand the safety and reliability aspects in more detail, this overview of instant electric faucets is a useful read.
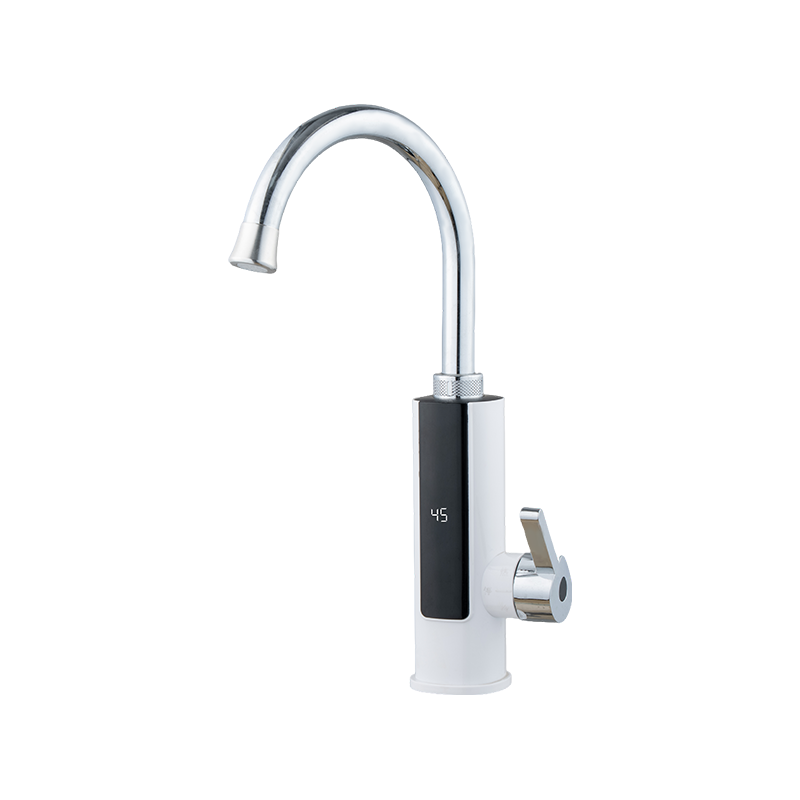
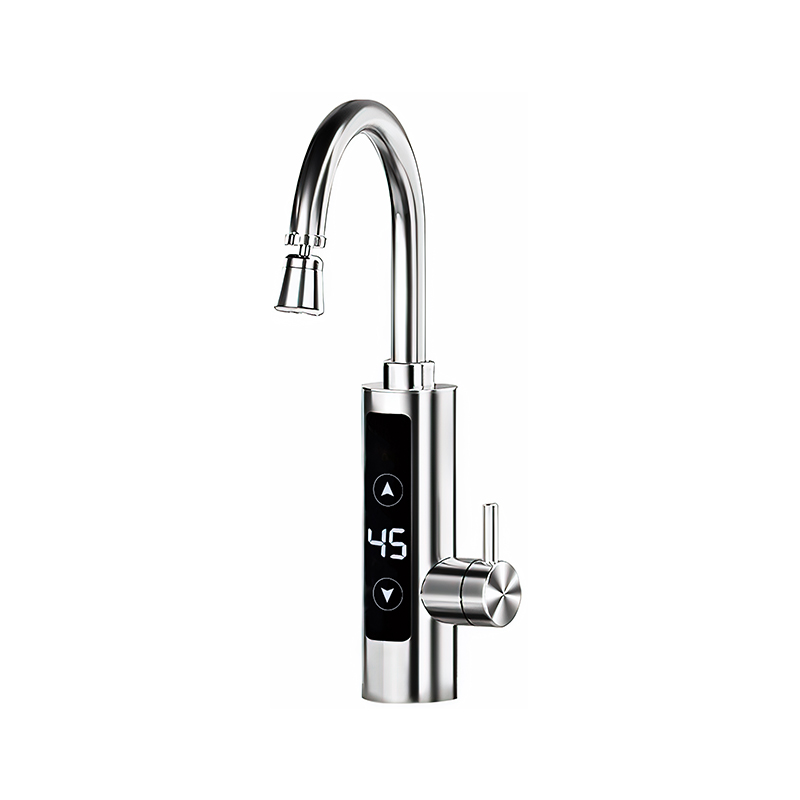 BSDF-01X-34 Stainless Steel Anti-Dry-Burn Instant Electric Hot Water FaucetThis stainless steel instant faucet features separated heating chamber and digital temperature display, with anti-dry-burn protection to safeguard the element if water supply stops. Its all-metal body resists scaling, making it a durable leak-conscious upgrade.View Product →
One example of the design described above is an anti-dry-burning stainless steel electric hot water faucet that uses a separated heating chamber and a digital temperature display. The anti-dry-burn function protects the heating element if the water supply is accidentally shut off, while the stainless body resists scaling and corrosion better than chromed plastic. Models of this type are intended to be installed directly at the kitchen sink, with a cold water inlet and an electrical feed replacing the traditional hot-cold hose pair. The visible construction gives you an easy way to inspect the inlet union and the chamber end cap during routine maintenance.
Key takeaway: Instant electric faucets are not immune to leaks, but their compact design reduces the traditional base-leak failure points such as hot water supply hoses and complex cartridge bodies.
How to Prevent Faucet Leaks in the Future
Preventing a faucet leaking from the base is usually simpler than repairing one. Most seal failures are accelerated by neglect: mineral scale grows, O-rings harden because they never see fresh lubricant, and packing nuts loosen because nobody checks them. A short seasonal maintenance routine can extend the life of both mechanical and electric faucets by several years. You do not need to be a plumber to perform it; the whole routine takes about ten minutes every few months.
Seasonal Maintenance Checklist
- Monthly base check: Wipe the base and the deck plate with a dry cloth, then wait 15 minutes to see if any moisture reappears.
- Aerator and filter cleaning: Unscrew the aerator and rinse it every three months; soak it in vinegar for 20 minutes if you live in a hard-water area.
- Packing nut check: Gently tighten the packing nut with a wrench; do not force it, as overtightening will deform the seal.
- O-ring replacement program: Replace the spout O-rings every two years for a kitchen faucet used daily.
- Descale the internal chamber: For instant electric models, run a vinegar–water solution through the heating chamber every 12 months to dissolve scale before it lifts the end-cap seal.
- Pressure check: Test the system pressure with a gauge attached to an outdoor hose bib; install a pressure-reducing valve if it sits above 80 psi.
Water chemistry is the largest hidden factor. In areas with hardness above 150 mg/L, scale forms much faster on heating elements and valve seats. A simple whole-house or point-of-use water softener reduces the load on every seal and makes both conventional and instant faucets last longer. For instant electric faucets, avoid operating the heating element without water flowing through it; even a few seconds of dry running can overheat the element and distort the chamber seal. If you leave home for more than a week, close the shutoff valve under the sink. This protects your kitchen from any slow leak that may develop while you are away.
| Maintenance Task | Frequency | Best Practice |
|---|---|---|
| Inspect base for moisture | Monthly | Wipe dry, observe for 15 minutes |
| Clean aerator / filter | Every 3 months | Soak in vinegar to dissolve scale |
| Tighten packing nut | Every 6 months | Use light torque, avoid distortion |
| Replace O-rings | Every 2 years | Use silicone grease on new rings |
| Descale instant heating chamber | Every 12 months | Run vinegar–water solution, then rinse |
| Verify supply pressure | Annually | Keep below 80 psi |
Key takeaway: Prevention is mostly about removing scale, keeping O-rings lubricated, and checking pressure. A 15-minute monthly habit can eliminate most faucet leaking from the base cases before they cause damage.
Choosing a Leak-Resistant Faucet: What to Look For
Faced with a persistent faucet leaking from the base, many homeowners and property managers decide that replacement is the right move. If you are in that position, the next question is how to choose a faucet that stays leak-free for years. The material, sealing technology, waterproof rating, and ease of installation all determine the long-term reliability. Buying directly from a manufacturer or supplier can also give you access to better technical specifications and more flexible service terms, especially if you plan to purchase in volume and test samples before committing.
Material and Construction Quality
Stainless steel bodies resist corrosion and physical wear far better than ABS plastic, although ABS is lighter and provides excellent electrical insulation in electric models. For instant electric faucets, the heating chamber is normally made of stainless steel or another thermally stable alloy. The presence of a metal chamber with a fully machined sealing face is a strong sign that the manufacturer has engineered the product with leak prevention in mind. Check that the visible welds or joints are smooth and free of burrs; rough edges indicate that the sealing surfaces may not mate correctly over time.
Seal and Cartridge Technology
The most common base leaks occur because a low-quality O-ring fails prematurely. Ask the supplier what material the O-rings are made of. EPDM and FKM are the two most durable choices for hot water applications. A ceramic cartridge is another important feature for conventional faucets; ceramic discs are much harder than rubber washers and hold their sealing surface for years, reducing the chance of cartridge-related base leaks. For instant electric faucets, look for a temperature-controlled design with over-temperature and dry-burn protection. These features not only prevent accidents but also reduce thermal stress on the sealing parts, meaning the O-rings stay flexible for longer.
Waterproof Rating and Electrical Safety
An instant electric faucet is a water-heating appliance, so its waterproof rating matters. Models rated IPX4 are protected from splash in all directions, making them safe for both kitchen and bathroom installation. If you are buying for households with children or elderly residents, a model with leakage protection, grounding detection, and a residual current device offers an extra layer of safety. A faucet that trips its own leakage protection is not leaking in the traditional sense, but it is still indicating that moisture is getting into an electrical zone. That is a warning sign that must be checked immediately, not ignored.
One practical example is a constant-temperature stainless steel model that uses a ceramic cartridge and a heavy-wall heating chamber. The digital display shows live water temperature, and a mechanical thermostat cuts power if the temperature exceeds the set point. This reduces both scale-related seal damage and the risk of overheating the chamber. Another useful option is a quick-free-installation model with LED display, which reduces the number of threaded joints and with it the potential leak points. Because the inlet union and the heating chamber are the two main sealing areas in an electric faucet, each additional joint increases the chance of a future leak.
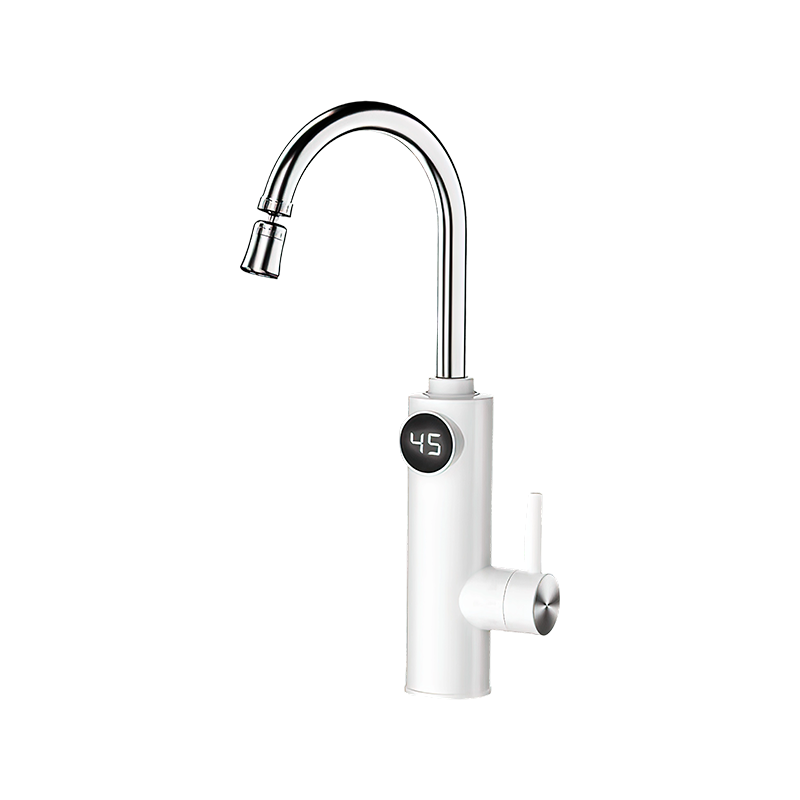
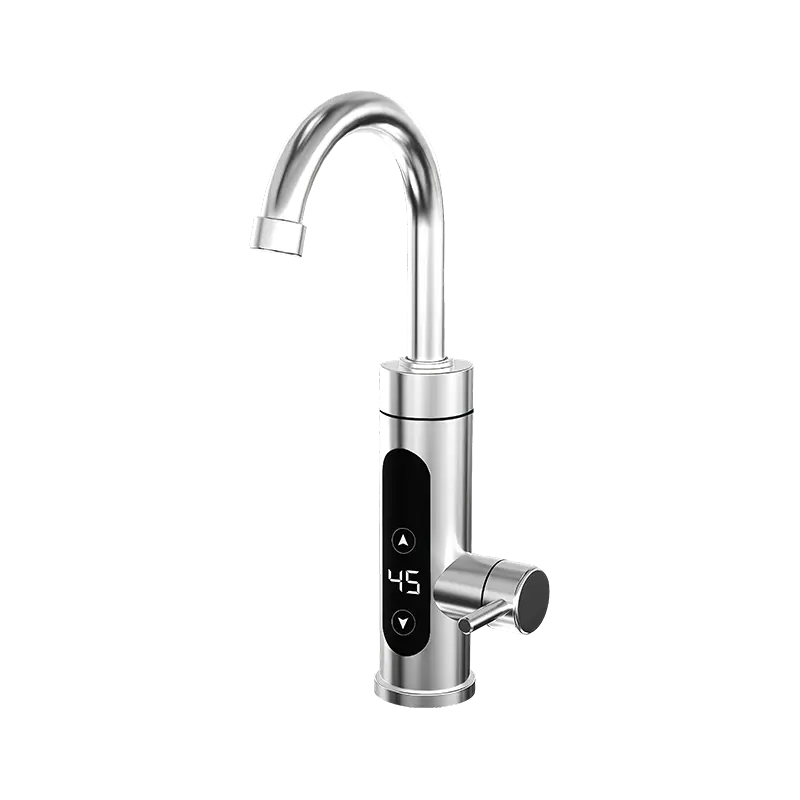 BSDH-02X-34 Constant-Temperature Stainless Steel Electric Hot Water FaucetA constant-temperature stainless steel model with ceramic cartridge and mechanical thermostat, this faucet reduces scale-related seal wear and overheating risk. It suits buyers prioritizing stable output and fewer leak points near the heating chamber.View Product →
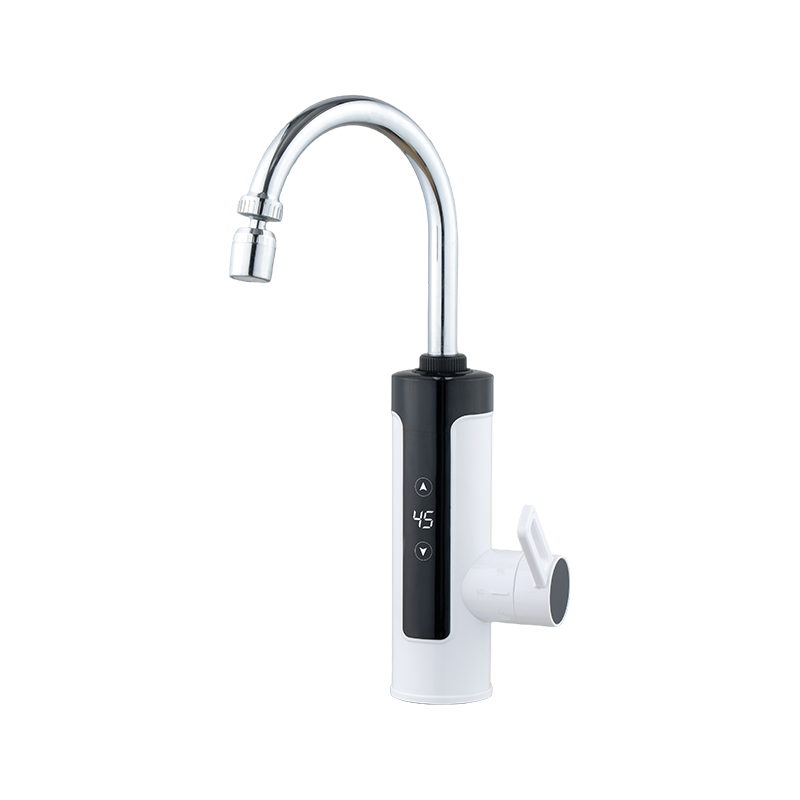
 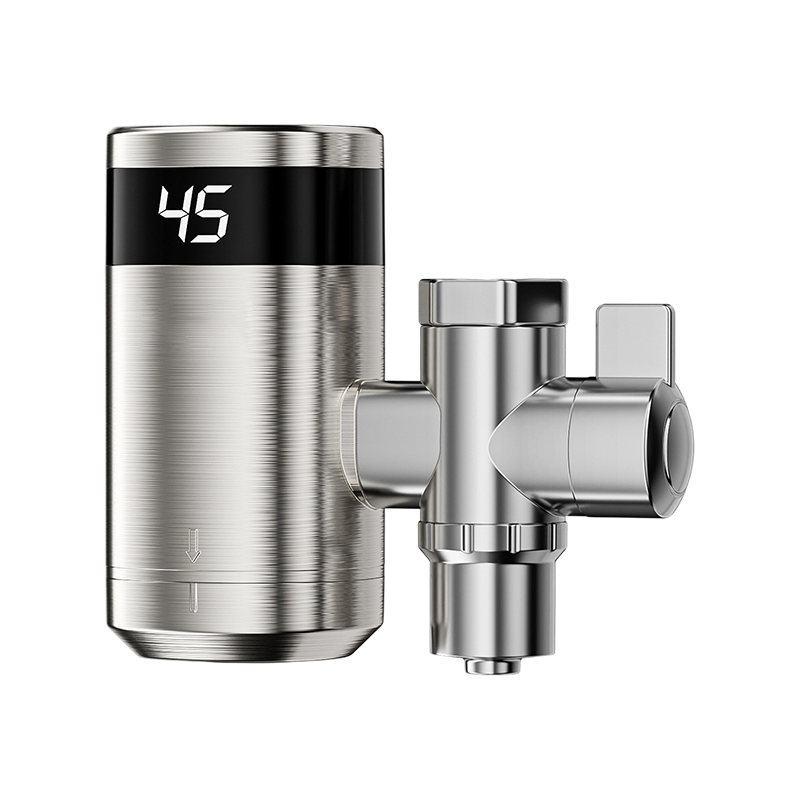 BSJ-04-34 Stainless Steel LED Display Quick-Connect Instant Electric FaucetThis quick-install stainless steel faucet uses a 3.4kW heater with LED temperature readout and multiple protections including dry-burn and leakage safeguards. Its simplified joint design helps minimize potential leak points for easy maintenance.View Product →
Working With a Manufacturer, Supplier, or Wholesaler
For wholesale buyers, distributors, and retailers, the selection criteria go beyond the homeowner view. A manufacturer with ISO 9001 and CE certification shows that quality control is embedded in the production process. Ask about the supplier’s test procedures: is every unit pressure-tested before packing? How often are sample lots checked for seal integrity? What warranty is provided for O-rings and heating elements? A professional supplier should be able to answer these questions clearly and also offer OEM/ODM service if you need custom colors, packaging, or specifications. Visiting the factory or requesting samples is a standard step before placing a large order; it gives you a clear picture of the production line and the attention paid to sealing components. Many leading manufacturers in the Ningbo region operate dedicated offices for export sales and are used to serving buyers who want fast feedback on lead times and technical drawings. Choosing the lowest-priced faucet without checking these factors often leads to a higher return rate and more customer complaints about leaks.
Key takeaway: When buying a replacement faucet, focus on stainless steel or high-quality ABS, certified electric heating components, a ceramic cartridge, and a supplier who can explain their seal test process. These factors predict whether your faucet will leak from the base years later.
Frequently Asked Questions About Faucet Base Leaks
Why is my faucet leaking from the base?The most common reason is a worn O-ring that has lost its elasticity after years of hot and cold cycling. A loose packing nut, a failed cartridge, or mineral deposits on the valve seat can also cause water to creep out where the spout meets the faucet body. In less common cases, the mounting putty below the deck plate has cracked, or the pressure in your supply lines is above 80 psi, forcing water past the seals. |
Can I fix a faucet base leak without a plumber?In most cases, yes. Replacing the O-ring and tightening the packing nut do not require specialized skills; you only need a wrench, a screwdriver, and a seal kit. If you discover a cracked body, deep corrosion pits, or water damage in the cabinet, that is the point where a professional plumber should take over. |
Do instant electric hot water faucets leak from the base?They can, but their design reduces the classic failure points. An instant electric faucet has no hot water supply line running under the sink, so there are fewer connections where drips can start. The most likely trouble spots are the inlet union and the heating chamber end-cap seal. Both are easily inspected and can be repaired with standard replacement parts. Regular descaling also keeps limescale from damaging the end-cap seal. |
Should I repair or replace a faucet that leaks at the base?Repair if the leak comes from an O-ring, packing nut, or minor scale buildup. Replace the faucet if the body is cracked, if the valve seat is deeply scored, or if you have repaired the same leak twice in less than a year. A one-owner faucet that has been in service for more than 12 years is also a good candidate for replacement, especially if the finish is worn and replacement parts are difficult to find. |
How often should O-rings be replaced to avoid base leaks?For a kitchen faucet used every day, replace the spout O-rings every two to three years. If you live in an area with hard water, replace them on a shorter cycle, because mineral deposits cut into the rubber more quickly. For instant electric models, inspect the end-cap seal annually and replace it whenever you notice even slight seepage or a brittle feel after you remove the cap for descaling. |
Key takeaway: A faucet leaking from the base is often a fast, low-cost repair. If the body is sound, the O-ring and packing nut explain most cases; if you see cracking or recurring failures, invest in a new faucet from a manufacturer that tests for seal reliability.
A faucet leaking from the base is usually a simple fix. Take a methodical approach: diagnose first, repair the soft parts, and only then consider a replacement. If you are a homeowner, the ten-minute inspection we outlined will catch most problems before they cause cabinet damage. If you are a distributor or retailer looking for reliable instant electric faucets, buying directly from a manufacturer can give you more control over quality, specifications, and pricing. Contact our team to discuss OEM/ODM requirements or request a sample batch. You can also browse our full product range to compare stainless steel, ABS, quick-free-installation, and bathroom instant faucet models.
The useful life of any faucet depends on three things: its base design, its sealing materials, and how often you remove scale and inspect the seals. A few minutes of preventive work now will keep your countertop dry and your plumbing uneventful. And should you ever see that first drip again, you will know exactly where to look.
Final takeaway: Do not live with a dripping base. Check the O-ring and packing nut, repair what you can, replace what you must, and apply the maintenance routine described here to keep the problem from returning.



NINGBO MAITENG ELECTRIC APPLIANCE CO., LTD. integrates production and sales. The company adopts a dual model of self-management and distribution sales.
- CONTACT INFO
-
NO.8 Yaobei Avenue,Simen Town, Yuyao City, Ningbo City, Zhejiang, China
-
 +86-159 5821 2132
-
 +86-574-62178444
-
 +86-159 5821 2132
-
 [email protected]
[email protected]
-
- SCAN IT
-
Mobile terminal

